By Julie Anderson
 If you were a crafty girl of the early 80s, you might have produced some ribbon barrettes. Or perhaps you were the lucky recipient of a set, fashioned for you with love by someone with nimble fingers and a little free time. Maybe they were in your school colors. Maybe they were embellished with beads at the bottom. If you had them, I’m betting you wore them with pride. Like me, you probably loved the way the ribbons hung down the length of your hair.
Me, I had a wardrobe of ribbon barrettes: some grosgrain, some satin, some metallic, some beaded. A girl never knows what she’ll feel like wearing, right?
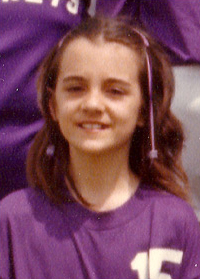
Here are some choice pics of me sporting ribbon barrettes in the 1980s. My softball team was the Batesville Casket Company Purple Hornets, so I crafted some satin lavender and deep purple barrettes for game days (pictured above).
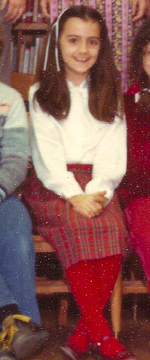
And here we have a jarring pale blue/deep red combo for a fourth grade class photo (pictured below at right). I still use this tactic, by the way: if you don’t have an accessory that matches, go for one on the OPPOSITE end of the color wheel. Works like a charm!
The Basic Ribbon Crafting Method
 Get some two-bar metal Goody slide barrettes.
- Cut two 1-yard pieces of thin, 1/8 inch wide ribbon. Use grosgrain or satin, but keep both in the same fabric family, i.e. two satin ribbons or two grosgrain ribbons. Choose your colors with care.
- Sew the tips of the ribbons together with a few tight stitches.
- Place the joined ribbon ends behind the curved clasp of the barrette. Pull each ribbon to one side, while keeping the meeting point in the center.
- Then tuck one ribbon through the center opening and pull to the other side. Follow up with the other ribbon. You’re BRAIDING with two ribbons. Easy!
- Be careful to not bunch your ribbons. You want even coverage of the metal bars with minimal wrinkling and bunching. A little overlapping is okay. Work your way on down. Enjoy the herringbone meshing of colors. Baby pink, ice blue, baby pink, ice blue . . .
- When you reach the end of the barrette, knot the ribbons securely. If you’re not using beads, then just knot the ends to keep them from fraying. If you ARE using beads, which I strongly recommend, string them on the ends and knot to keep them in place.
Et voila! Tres chic! You can make some to coordinate with all your favorite outfits, schools, and teams. Make some for your favorite girlfriend in matching colors, and plan to wear them on the same day to show the world that you’re besties. Fun! Be sure to have at least one pair with a white ribbon, so that you’ll be all aglow under the black lights during your next roller skating party.
Fortunately, you can purchase some ribbon barrettes online, if you want to bypass the whole shopping and crafting thing. I love these from Retroeighties in pink and green, using the classic two-ribbon braid I described above. How cute would these be with a pink Izod, khakis, and a D ring ribbon belt?

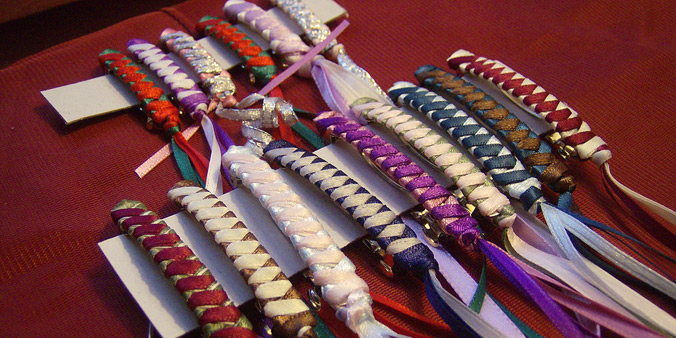
Here are some barrettes crafted using a slightly different technique than the one I described; the ribbons wrap all the way around the barrettes instead of thread through the center. Makes for a chunkier, more solid looking barrette. I love the metallics in the Victoria Arts & Crafts collection.

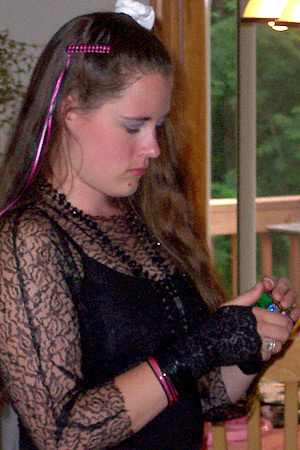
Check out this vintage look. Susan made that pink and black barrette herself. She’s head-to-toe 80’s with black lace, blue eyeshadow, and a Rubik’s cube. Rock on, girl! You look totally awesome!

(Photo courtesy of Susan Cleveland)

(Photo courtesy of Like Totally 80s)

June 23, 2015
Great post! I had forgotten how much I loved these back in the day!